From My Carolina Home

Quilting, cooking, reading books, gardening, crafting, sewing, photography and more


15 Comments

Well Loved Quilt Repair – Purple Sunbonnet Sue

Recently I finished up another hand repair of a well-loved quilt.  I really enjoy doing this, and love having people bring me these quilts.  This was Donna’s daughter’s quilt when she was a baby, and now the daughter was becoming a mother.  Donna wanted the quilt repaired so that her new grand-baby could cuddle with it too.  There were several larger tears in this vintage quilt, including this one that was just not going to take kindly to being repaired.  This tear was in four directions from a center hole.

Well Love Quilt Repair at From My Carolina Home

So, I had to get a bit creative this time. I ironed down the tears with a bit of very light fusible web just to hold them in place. Then, I made a yo-yo from a pink print to make a flower applique large enough to go over the entire area of damage. I pinned it into place with a dark purple center to go with the dress on the Sunbonnet Sue main appliqué.

Well Love Quilt Repair at From My Carolina Home

I stitched both down by hand.

Well Love Quilt Repair at From My Carolina Home

But, that dark center kept drawing my eye to it, when I wanted it to just be an accent to the main motif. So, I frogged off the dark purple and replaced it with a lighter purple, fussy cut flower.

Well Love Quilt Repair at From My Carolina Home

Around the main appliqué, some hand stitching was needed to close up the gaps and small tears.

Well Love Quilt Repair at From My Carolina Home

After using a light fusible web on the longer tear in the background here, there was enough extra bulk in the background to make hand stitching with an over-whip possible.  Because the quilt is tied and not quilted, there was fabric to move around a bit.

Well Love Quilt Repair at From My Carolina Home

You can see the seam here, but that is better than a tear, and should hold up to at least moderate use.

Well Love Quilt Repair at From My Carolina Home

A few more stitches around the appliqué and that part was done.

Well Love Quilt Repair at From My Carolina Home

The pink border was pulling up from the white background in spots, so all those areas were hand stitched back in place.  All done, and didn’t take that long.  I finished the repairs in about 3 hours.  Now the little flower appliqué is a cute accent and the focus is the Sunbonnet Sue.

Well Love Quilt Repair at From My Carolina Home

I had to applaud her for wanting to pass on such a piece of living memory. For me, this is the true measure of how much a quilt is valued, to be worn out and repaired to wear out again. This has to be the highest complement any quilter can get!

If you are local and have a well loved quilt needing repair, my rates are very reasonable, and are charged by the hour.  I am also willing to do quilts mailed in, if you are willing to pay the postage both ways.  Just send me an email at frommycarolinahome at gmail dot com and let me know what you need.  You can see more of my repair work on my Carolina Mountain Longarm Association page – Carole’s Quilts.  Also, I have done posts on how I do repairs which you can read about in Repairing an Old Damaged Quilt and in Applique Quilt Repair if you would like some tips on repairing your own quilts.

Do you have a well loved fabric memory?


7 Comments

Summer Chilled Corn Crab Soup

A luncheon on a hot summer day needs something cold and delicious!  I had an idea for a cold crab and corn soup, and decided to try it out on my friends at a recent luncheon.  They pronounced it good, and I liked it too.  I gave DH a bowl for his lunch, and he decided to heat it up in the microwave.  He said it was good hot too!  So, here’s the recipe for a cold refresher in summer, and would do nicely hot for a fall harvest soup too.  And it is gluten free too, as two of my friends have that dietary requirement.

Corn Crab Summer Chilled Soup at From My Carolina Home

Gather your ingredients, and chop some onions.

Corn Crab Summer Chilled Soup at From My Carolina Home

Reserve 1/2 cup of corn kernels in a covered container for garnish, with chopped green onion.

Corn Crab Summer Chilled Soup at From My Carolina Home

Sauté 1/2 cup chopped onion and 2 cloves garlic in 1 teaspoon olive oil until soft and translucent, don’t brown.

Corn Crab Summer Chilled Soup at From My Carolina Home

Remove from heat and put in blender.

Corn Crab Summer Chilled Soup at From My Carolina Home

Add one can of corn with liquid, and blend until smooth, pulsing as needed to get larger bits pureed.

Corn Crab Summer Chilled Soup at From My Carolina Home

Add 1 cup half and half (I used fat free), salt and pepper, and blend again until well blended and fairly smooth.

Corn Crab Summer Chilled Soup at From My Carolina Home

Add a second can of corn with liquid, and pulse for a rough chop of the second can of corn.  Remove blender jar from the base, and add 1/4 cup whipping cream (optional, but really makes the soup creamy and delicious, substitute more half and half instead if you want a lower fat content) and 2 cans of drained crab meat. Stir lightly with a spoon.

Corn Crab Summer Chilled Soup at From My Carolina Home

Cover and refrigerate at least one hour or overnight.

Corn Crab Summer Chilled Soup at From My Carolina Home

At serving time, ladle into small bowls, garnish with reserved corn kernels, a bit of green onion, and a few drops of white truffle oil (if you like). Enjoy!

Corn Crab Summer Chilled Soup at From My Carolina Home

Summer Chilled Corn Crab Soup

1/2 cup chopped onion
2 cloves Garlic
1 tsp olive oil
2 cans 15-oz each whole kernel corn, divided, liquid reserved
1 cup half & half
1/4 cup whipping cream (optional)
salt and pepper to taste
2 6-oz cans lump crab meat
1 green onion chopped
Optional – few drops of white truffle oil

Reserve 1/2 cup of corn kernels in a covered container for garnish. Sauté onion and garlic in olive oil until soft and translucent, don’t brown. Remove from heat and put in blender. Add one can of corn with liquid, and blend until smooth, pulsing as needed to get larger bits pureed. Add half & half, salt and pepper, and blend again for 30 seconds or so, until well blended and fairly smooth. Add the other can of corn with liquid, and pulse for a rough chop of the second can of corn. Remove blender jar from the base, and add the whipping cream and the crab meat. Stir lightly with a spoon. Cover and refrigerate at least one hour or overnight. At serving time, ladle into small bowls, garnish with reserved corn kernels, a bit of green onion, and a few drops of white truffle oil (if you like). Enjoy!

Download the recipe – Corn Crab Soup

Summer Luncheon at From My Carolina Home

Do you enjoy chilled soups?


Sharing

Creative Muster


211 Comments

The Swing Bag – A Scrap Dance Pattern – with a giveaway!

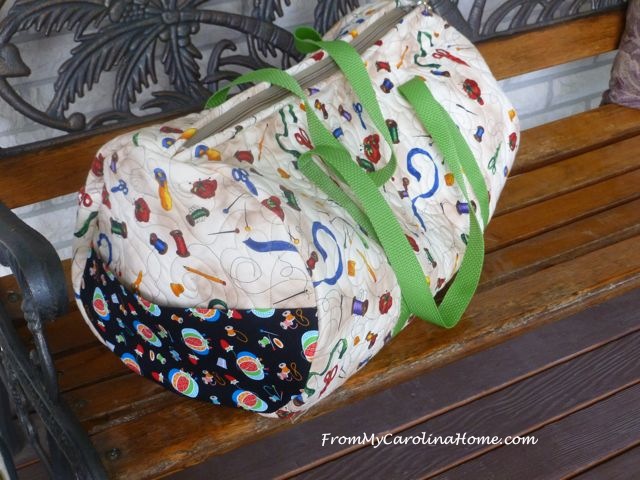
Wouldn’t you love to have a great travel bag for the holidays, or any travel weekend?  This weekender bag is compact yet packs a punch. You won’t believe how much you can fit into it, and still have organization!  It will hold enough clothes and toiletries for a weekend getaway, just Swing it over your shoulder and dance off to the beach or the cabin in the mountains.  The construction isn’t hard, just follow the steps one by one. The great majority is constructed flat, so it is easy to handle. Use up scraps by making a larger piece of fabric and cutting your focus piece from it. Use charm squares, jelly roll strips, layer cake squares, crumbs or orphan blocks, your only limit is your imagination! For ease of understanding, I’ll use a single focus fabric with a light lining and a dark accent, in adorable sewing prints.  Read all the way to the end for a fun hop and a giveaway too!

Materials List

Focus Fabric – either one fabric, or a scrappy one
One Base – 38 inches x 22 inches- scrappy, orphan blocks, jelly roll strips, charm squares, or single fabric
Two Circles – 12 inches in diameter
Four fabric scraps 2 x 2-1/2 inches for zipper tabs

Lining Fabric – (tip – lighter fabric lining makes it easier to see contents)
One Base – 38 inches x 22 inches
Two Circles – 12 inches in diameter

Accent Fabric
Two Circles – 12 inches in diameter
One small pocket – 10 x 16 inches
One long pocket – 16 x 22 inches

Batting scraps –
one 38 x 22 or a bit larger
two 12 inch circles

Notions
One 20-inch heavy duty zipper
3+1/4 yards nylon webbing – all one piece
Optional – 2-1/4 yards of binding (2-1/2 inches wide, folded lengthwise)

Construction

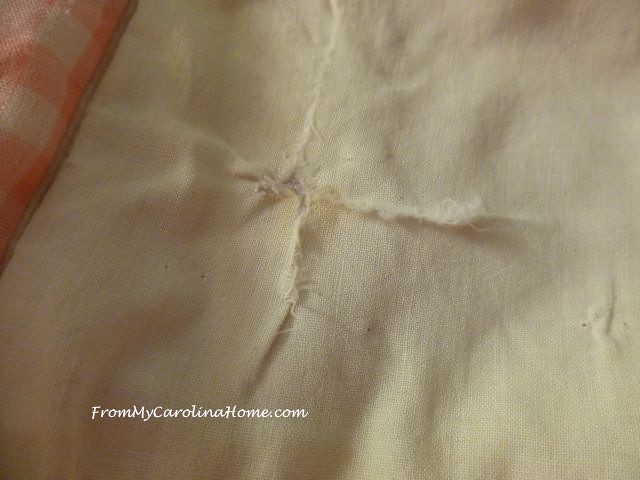
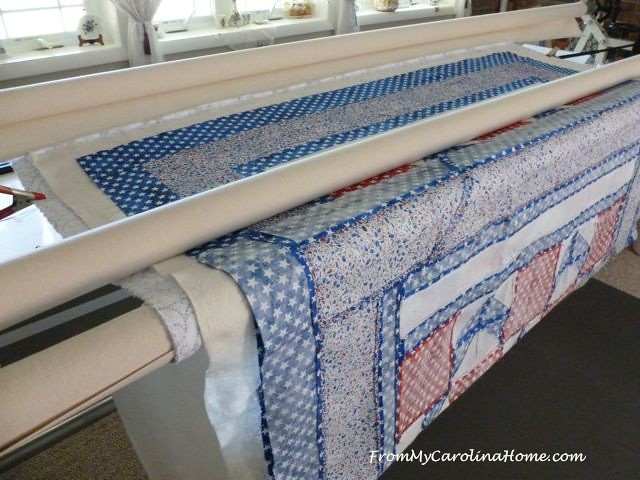
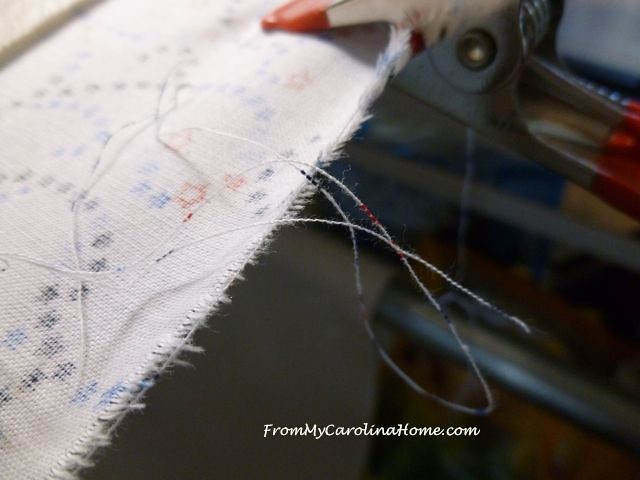
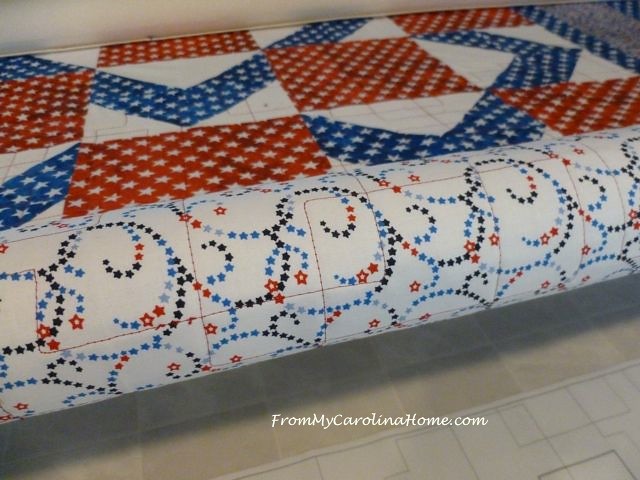
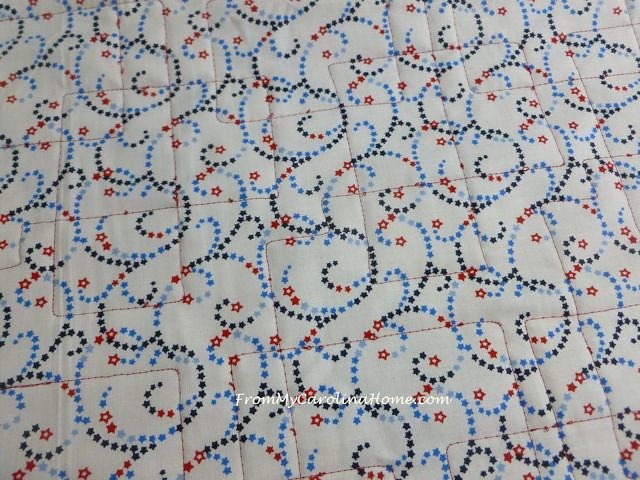
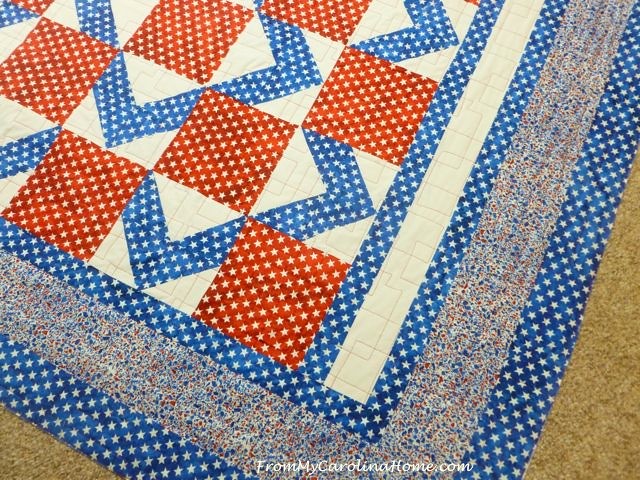
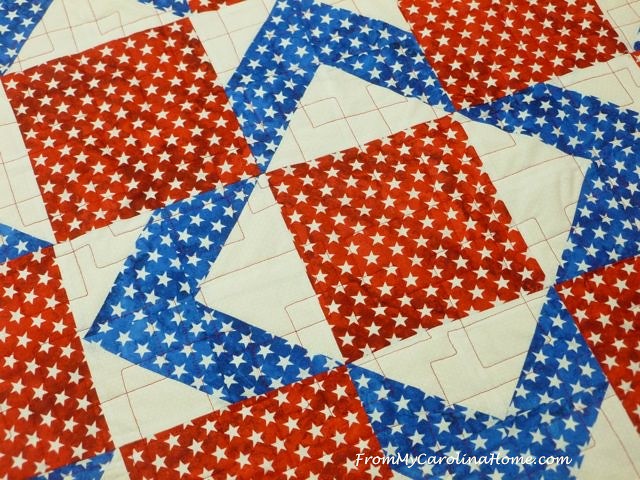
Begin by layering the focus fabric base, batting and lining fabric base together in a quilt sandwich and quilt as desired. Repeat with both focus fabric circles making a sandwich of one focus circle, batting and lining circle.

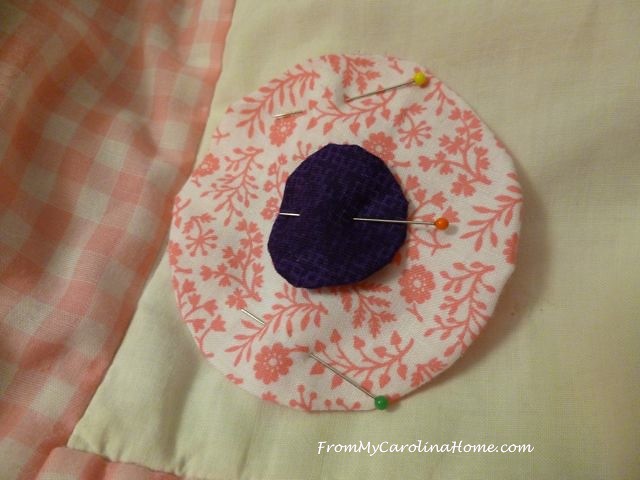
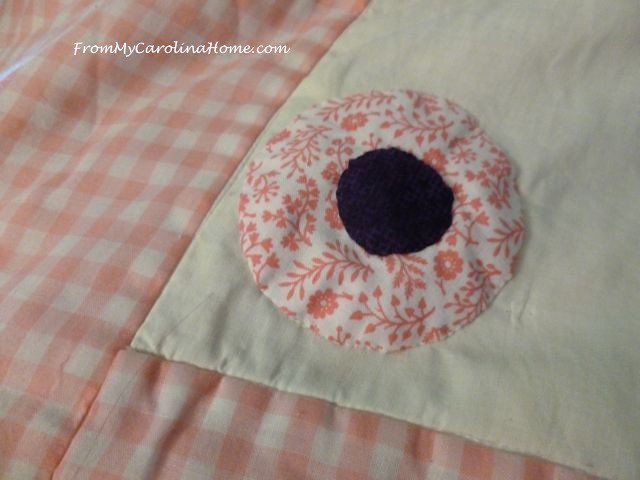
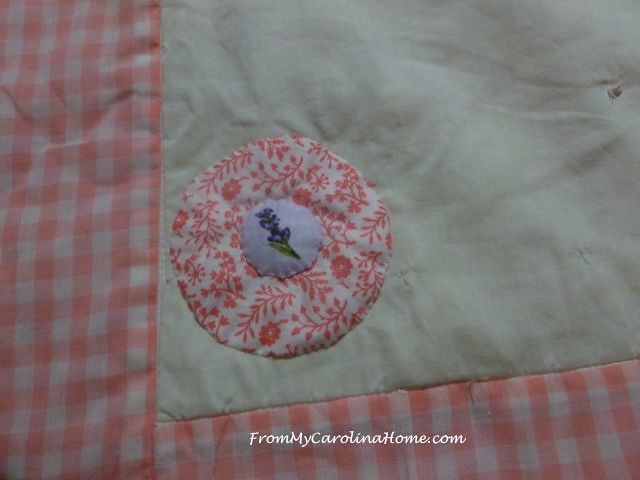
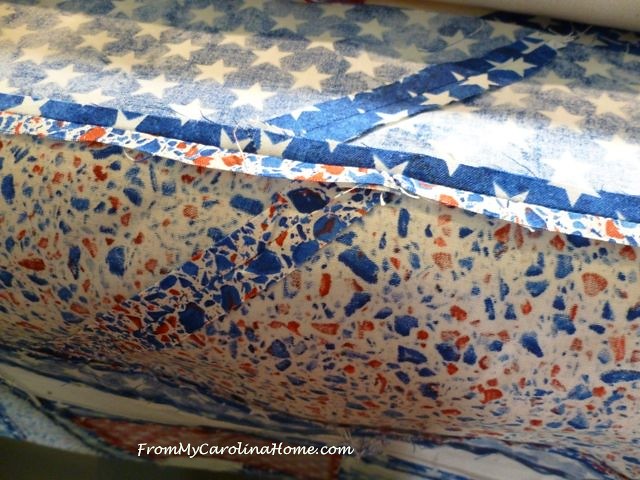
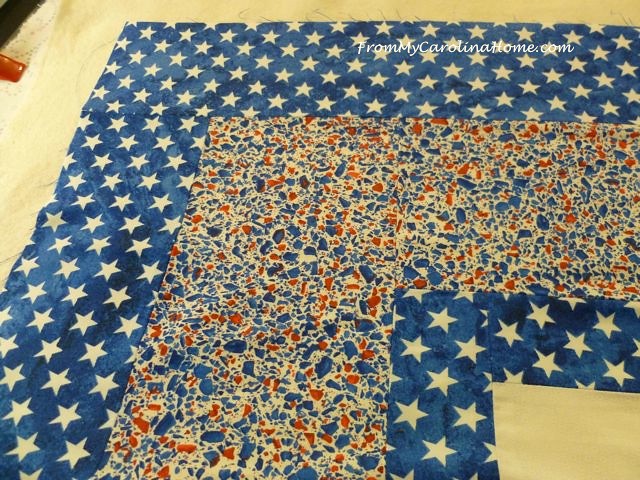
Fold the accent fabric circles in half, wrong sides together, to create a pocket. Align with the bottom edge of the quilted circle on top of the focus fabric. These pockets will end up on the outside of the bag. Baste in place.

Fold the small pocket accent fabric in half, right sides together, to form a rectangle 10 inches x 8 inches. Sew the sides and part of bottom, leaving an opening for turning. Turn, press.  For the long pocket, meet long right sides together and sew across on the 22-inch side to form a tube 8×22 inches. Turn and press.

Lay your base sandwich on a flat surface lining side up and place the pocket units as follows, using the folded edge of pocket units as the top. For the long pocket, place 6 inches down from the short edge of the base, meeting the side edges. Stitch across the bottom only, leaving the top open. Baste the sides to the sandwich, or stitch for a bit more strength. For the small pocket, place on the other end of the base sandwich 4 inches from the edge. Stitch the one side, across the bottom catching the opening for turning, and up the other side. Leave the top open.

Sew the ends of the nylon webbing together with a half inch seam, making sure there are no twists in the length. Finger press the seam open.

Lay the base on a flat surface, focus fabric side up. Lay the webbing on the base, seam in the center of the base, 6-inches in from each side. You’ll have about 5-1/2 to 7-inches overhang for handles (depending on if you made the bag with 3 yards even or 3+1/4 yards as amended for longer handles). Pin in place along the webbing, to ensure that it stays straight. Put two pins in the webbing to mark 4-inches down from each short edge, this is where you will stop sewing, leaving a portion of the handle free on each edge. Begin sewing along one edge of the webbing, when you get to the two pins, sew across the width of the webbing (backstitch and sew again if desired for extra strength), then back down the other edge. Repeat for the other end, and meet your sewing line back where you started. Tie off, repeat for the other side.

Using focus scraps, add tabs to the ends of the zipper. Begin with one end, placing right sides together and stitch across making sure to get close to the zipper teeth, but not over. Align the second piece right sides together, and sew on top of the previously sewn line to ensure your needle doesn’t hit the teeth. Fold fabric away from zipper creating the tab. Repeat for opposite end. Trim to width of zipper.

Pin zipper to one short end of base, right sides together. Sew 1/4-inch seam from edge. Tip, start with the zipper half closed. Sew almost to the pull, stop needle down and lift presser foot, unzip the zipper placing the pull behind the foot where you’ve already sewn. Continue sewing.

Lay the base flat, wrong side up, fold zipper to the wrong side, creating a channel for the edge.  Stitch in the ditch to encase the raw edges.

Bring the right side of the base under the project to meet the other side of the zipper, right sides together. Sew.

Turn right side out, and fold zipper to create channel and stitch in the ditch in the same manner.

Meet the edges of the channels on each end of the zipper and stitch down close to the raw edge.

Open zipper and turn bag inside out. Fold the circle in half to find the midpoint which will be the top point and the bottom point. Lay bag out, and find the midpoint fold of the bag. Match this point with the midpoint of the bottom of the circle including pocket right sides together. Match the center of the zipper with the top edge.

Pin all the way around, easing in if needed. Sew with 1/2-inch seam, going slowly, and readjusting the project as needed to keep the seam under the presser foot flat.

Optional – finish seams with binding as usual, sewing by machine. Turn right side out. Remove pins holding handles.

The long pocket inside is now divided into three smaller sections by the application of the webbing handles.  The smaller pocket is higher up inside to hold lighter easy to lose items.

After the initial bag was done, I showed it to some friends who suggested a few improvements.  So, the pattern has several options for extras in pockets and details.  Purchasing the pdf file on Craftsy for the very low introductory price of just $2 will give you more photos and more detailed instructions.  Click on Swing Bag for the pattern link. The pattern will remain up here through the first of August as part of the Christmas In July Blog Hop hosted by Sarah at Confessions of a Fabric Addict.  In August, the pattern will be taken down from this post and only be available in my Craftsy store at its regular price.  I really appreciate any purchases as that is the way I pay for the costs of the blog, so I can bring more great free patterns, giveaways and projects to readers.  I also invite new readers to follow my blog for a wide variety of subjects, crafting and cooking, sewing and quilting, gardening and photography, mountain living and more.

And have fun with the  Christmas In July blog hop which will have new posts every day for 12 days.

Here are the participant blogs, have fun!!  And read down below for the giveaway!

Friday, July 14th
From My Carolina Home– You are here!

.

Saturday, July 15th

.

Sunday, July 16th

.

Monday, July 17th

.

Tuesday, July 18th
.
Wednesday, July 19th 

.

Thursday, July 20th

.

Friday, July 21st

.

Saturday, July 22nd 

.

.

.

And as if great holiday ideas and a tutorial weren’t enough, this year Sarah at Confessions of a Fabric Addict arranged something special!  The lovely folks over at Free Spirit Fabrics have donated not just one item for a giveaway, but THIRTEEN!  And it’s pretty drool-worthy stuff, too – it’s Tula Pink’s new holiday line, Holiday Homies!!!

Sarah has six design rolls, six layer cakes, and one fat quarter bundle to give away – and here’s how she’s going to do it!  Visit each stop on the hop, including this blog, and leave a comment on each post for the day.  At the end of the hop,  Sarah will do a giveaway for each day by putting everyone’s name in the hat who commented that day (from all that day’s hop-blogs), and drawing a winner for that day.  That will be twelve winners – the design rolls and layer cakes.  Then she’ll put all the names from all the days in a hat and draw out a grand prize winner for the fat quarter bundle!  Only one prize per person, though – let’s spread it around a bit!  So carve out a bit of time to visit all the blogs and comment – it makes the time bloggers spend on each post worth it when we see what people think about our work!

So, make a travel bag, visit blogs, comment to enter for hop prizes, do you think that will keep you busy for a weekend?  What else is on your to-do list?  Are you starting on your holiday sewing yet?


Sharing

Finished or Not Friday


21 Comments

The Safelight Project with chances for you to win!

Recently I had a very nice conversation via email with a lady named Laresa about our local women’s shelter and crisis intervention services.  Safelight incorporates many services for domestic violence victims and sexual assault victims providing counseling, case management, court advocacy, support groups and job training under one umbrella organization.  One of their services, a shelter for women escaping domestic violence has undergone some changes in the past year.  I had a few small items I could donate to the women at the shelter, but the more I thought about this, the more I came to realize how meaningless my little gesture would be.  So, I have hatched a plan.  Here is where you come in, dear reader, I cannot do what I have in mind by myself.  I need your help.  There are two ways for you to help plus you’ll have an opportunity to win some great prizes by helping me to provide gift bags like these to 35 residents.

Safelight Project Gift Bag

First, I’d like to invite my stamping and card making readers to make some cards of encouragement and support for these ladies. Something that says “you are worth it”. Cards that are heartening and supportive. Make several in the same design, or use different designs, it is up to you.

A Little Something Card at From My Carolina Home

The only request is to keep them uplifting in tone, and not to use a religious theme as there are many different religions represented in the residents, and we won’t know who is getting what.  Inside the card you can hand write, stamp, or use your computer to make an uplifting message.  You could copy a poem, make up your own sentiment, or say something like this on the inside (feel free to copy this if you like) –

“As you go through this time of change,
know that you are important and valued.
You deserve to be happy and safe.
Good luck with your future plans.”

Stamping Cards at From My Carolina Home

Sign the card as you like – either “A friend who cares” or something similar, your first name or whatever you are comfortable signing.  Mail your completed cards to me with an envelope for each one addressed only as “For You”.  At least 35 cards are needed for now, and any additional will be saved for future residents, as (unfortunately) there are new residents regularly.  You can look to the designs on this post for inspiration, and for even more inspiration, see the blogs of two stamping friends who have graciously agreed to show designs and ideas for this event.

Start Where You Are designed by Heather North at Heather's Creative Blessings

Heather’s blog, Heather’s Creative Blessings has some wonderful ideas, and is posting today for this event. She does beautiful cards of encouragement every month.   Her ideas are just so perfect for this purpose, check out her post today –“You Are Worth It”.  You can click on the card above and the ones below for her individual posts on these uplifting messages.

You Are Capable of More Than You Know by Heather North at Heather's Creative Blessings   NeverGiveUP

Then check out Heidi’s blog for her post today for the Safelight project – My Little Stamping Blog. Heidi has so many wonderful ideas, and is also helping to spread the word for this charity event. Here is one of her cards, One Sip At A Time, click on the picture to see her post on this inspirational card.

One Sip at a Time designed by Heidi at My Little Stamping Bloc

I’ve created a Flickr group for you to share your designs.  Click on Safelight Project Flickr Group to see others and comment, and upload your designs for sharing.

Floral card

If you are not a stamper, you can still be a part of this project.  I need 70 sponsors to fund the cost of one-half of one bag and all the goodies inside.  That will be $5 per bag, with each bag having 2 sponsors.  This will purchase a reusable tote bag plus 8-9 full size items for inside such as nice hand lotion, mud mask, hair treatment, nail polish, a book or a puzzle, bath gel, new hairbrush, makeup, lip gloss and similar items as available.  See the picture at the top of the post for an idea of what they will look like.  Think of as a day spa in a tote, something to pamper these brave women who have taken an important step to independence, while giving them a bit of encouragement.

Springtime Cards ~ From My Carolina Home

For every bag sponsored and card sent in, you will be entered into drawings for some wonderful prizes!!

First up, for everyone sending handmade cards in the USA, you’ll get one entry per card for this spectacular set of cardmaking supplies from Stampin UP!  Thanks so much to Rachel at the Stampin’ Up corporate office for providing this fantastic prize!   Click on the link to find a Stampin UP! demonstrator near you.  The Soft Sayings Card Kit contains –
* Folded card sizes: 4-1/4″ x 5-1/2″ (10.8 cm x 14 cm), 3-1/2″ x 5″ (8.9 cm x 12.7 cm), 3″ x 3″ (7.2 cm x 7.2 cm)
* Includes set of 15 photopolymer stamps, clear stamp block, 20 printed card bases and coordinating printed envelopes, giftable kraft box, die-cut accents, Stampin’ Spot, Baker’s Twine, washi tape, Stampin’ Dimensionals
* Makes 20 cards–2 each of 10 designs–using the included Soft Sayings Stamp Set

All those sponsoring a half-bag, and international card making participants will be entered into a drawing for a $50 MasterCard gift card  so you can spend it anywhere, provided by From My Carolina Home.  Sponsor a whole bag and get two entries!  So everyone has a chance to win!

The deadline for entering via sponsorship or card making is August 1st. 

At that point, I’ll do the drawings, complete the bags and deliver them.

The Safelight Project at From My Carolina Home

You can sponsor in two different ways, if you use Paypal, you can send your donation to my email {frommycarolinahome (at) gmail dot com} using the send money to a friend option.  If you are not a Paypal user, you can mail a check to my address.  Sponsor half a bag at $5, or a whole bag at $10, any help is appreciated.

Address to send cards or donations –
Safelight Project
c/o Carole Carter
PO Box 524
Mountain Home, NC 28758

Can you help with this project for Safelight to encourage women who are changing their lives?


The Safelight Project at From My Carolina Home


23 Comments

Quilts of Valor – Diamonds

Loading the next Quilt of Valor, this one is a really nice diamond pattern. The red, white and blue prints go really well together. The pattern is so simple, just large half square triangles arranged in a nice pattern with red squares.

Quilt of Valor Diamonds at From My Carolina Home

Loading it on the longarm, ready to begin quilting. I auditioned thread, and decided on red for a bit of punch on the white areas.

Quilt of Valor Diamonds at From My Carolina Home

This one had a different issue that I have frankly never seen before. The middle border is larger than the outer border.

Quilt of Valor Diamonds at From My Carolina Home

I think part of the reason that this happened, is the quilter used bias seams in the borders. I have no idea why piecers do this. You need a bias seam in binding, but not in borders. Using straight border seams to join border strips will result in a more stable border, just like piecing the blocks.

Quilt of Valor Diamonds at From My Carolina Home

Luckily, a bit of stretching of the final border and steaming the middle border flattened it out for easier quilting. I stitched the edges down to hold it in place.

Quilt of Valor Diamonds at From My Carolina Home

The backing gave me a bit of a fit in the quilting process. These raveling edges produced strings that got wrapped around the encoder wheels on the longarm machine head, and made a mess with the quilting. There was a section I had to take out, as the machine started skipping stitches and not sewing at all while I moved the head. When the encoders don’t spin, the machine doesn’t stitch. If you have a backing like this, pink the edges to prevent the raveling.

Quilt of Valor Diamonds at From My Carolina Home

With this linear pantograph, it was so obvious when a glitch happened.

Quilt of Valor Diamonds at From My Carolina Home

The pantograph is a modern design called Contempo by Lorien Quilting. I thought it would be suitable for a more masculine design.

Quilt of Valor Diamonds at From My Carolina Home

It does well with the backing too, a perfect starry print for this QOV.

Quilt of Valor Diamonds at From My Carolina Home

Aurifil in the top and Bottom Line in the bobbin, made for subtle quilting.

Quilt of Valor Diamonds at From My Carolina Home

Here’s a closer look at the corner.

Quilt of Valor Diamonds at From My Carolina Home

Once again, my favorite thing to do is pick threads that show in the backgrounds of the piecing and blend with the colors in the quilt top.

Quilt of Valor Diamonds at From My Carolina Home

Quilt of Valor Diamonds at From My Carolina Home

Even though the pantograph is quite linear, I think it works well with this design.  So, all done and ready to give back to the piecer for binding.

Quilt of Valor Diamonds at From My Carolina Home

Are you quilting today?


Sharing

Main Crush Monday


28 Comments

Summer Luncheon

Last week I wanted to have some friends over for lunch and chat time.  It has been a while since I had some gal time, so I planned a nice day for the veranda.  The pots were all planted, flowers blooming all over, and I thought it would be nice to have a meal on the outdoor table.  So I invited some friends, planned a menu, decided on a color scheme for a tablescape and got excited about two new recipes I was developing.  And then, it decided to rain on the day of the luncheon.  So, instead of setting up outside, I set the table in the library in front of the sliding doors so we could have a view.  Better to have the meal inside than not at all!  So, I  spread a tablecloth over the table, brought the pots with the pink flowers inside, and cut some pink hydrangeas for vases to complete a centerpiece.

Summer Luncheon at From My Carolina Home

I wanted pink and green to be the main colors.  The green napkins I have were either too dark or too yellow, so I decided to go with white.  Pulling out the white ones, I found I only had four.  But, I can sew, and I have white fabric.  I went down to the basement and whipped up six white napkins on my serger.  Do you need to do this sometime?  I have a tutorial on Serging Perfect Napkins for you (and also tells how to do it with a sewing machine). These only took me a half hour to run up.

Serging White Napkins for Summer Luncheon at From My Carolina Home

I tied pink ribbons to the acrylic napkin rings to add a bit more pink to the table.

Serging White Napkins for Summer Luncheon at From My Carolina Home

The colors were pulled from these wonderful salad/soup plates that I got at the thrift store. They are deep enough for a light serving of soup or salad, yet shallow enough for use as a lunch plate.  I love the design and the scalloped edge.

Summer Luncheon at From My Carolina Home

Green chargers were set on the table, topped with my white stoneware and the pink salad plates. Individual salt and pepper shakers go at each setting, along with everyday flatware and pretty wine glasses.

Summer Luncheon at From My Carolina Home

Can you tell that it is raining outside?  At least it was light enough to get some pictures of the table.

Summer Luncheon at From My Carolina Home

Place cards had a small bird, and a sentiment “Your friendship is like a song of spring”, from a Stampin’ Up set.

Summer Luncheon at From My Carolina Home

The wine glasses were a thrift store score, Gorham lead crystal for 25 cents each, and they came with the little wine charms too.

Summer Luncheon at From My Carolina Home

Our luncheon began with a new recipe I developed for a chilled corn crab soup.  I’ll be sharing that soon.

Summer Luncheon at From My Carolina Home

Spinach salad was one of the main course salads, with fresh grated Parmesan cheese, tomatoes and blueberries.

Summer Luncheon at From My Carolina Home

Blueberry vinaigrette for the salad is another new recipe, but that one will have to wait as I am going to enter it in the State Fair competition. I’ll share it after the competition is over.  Ranch was also provided so guests had their choice.  I use this cut crystal sugar and creamer set more often for dressings and condiments than I do for their intended purpose.   I set the blueberry vinaigrette in a depression glass dish to keep the drips off my white tablecloth.

Summer Luncheon at From My Carolina Home

Asian chow mein noodles were passed in a separate dish so my gluten free friends could skip the crunchies, but the others could add them to their salads if they liked.

Summer Luncheon at From My Carolina Home

The other main course salad was a pasta salad with bacon, cheese and tomatoes (not gluten free). This lovely glass bowl was my mother’s, one of her favorite dishes for serving. It holds memories as well as food.

Summer Luncheon at From My Carolina Home

Dessert was a frozen strawberry treat made with fresh strawberries, strawberry yogurt, and bourbon. I found the recipe on the internet, and it was nice to do once, but I doubt I’ll do it again.  I added fresh whipped cream and a chocolate dipped strawberry on top to make it a bit more special.

Summer Luncheon at From My Carolina Home

The hydrangeas stayed fresh for several days past the luncheon.  We’ve enjoyed them on the pub table since the luncheon.

Summer Luncheon at From My Carolina Home

Have you had a fun day with friends recently?


Sharing

Pieced Pastimes Saturday Sparks


12 Comments

Be My Neighbor Block 13

Getting back to the Be My Neighbor quilt, I decided to lay out a number of fabrics all at once, and choose the fabrics for the last four blocks all at once. I plan to put the darker blue fabric on the last block in the final row, and I also wanted to distribute the colors across the row.  I have realized that I am going too slow on this at this point, and I need to finish all the blocks, do the sashing, and add the border(s), all before the end of July.  That will give me one month to get it quilted and bound in time for the State Fair this year.

Be My Neighbor Row 4 Plan at From My Carolina Home

I had this wonderful lattice fabric with roses that I wanted to use on one of the houses, and this block seemed the perfect one.

Be My Neighbor Block 13 at From My Carolina Home

Block 13 has a large piece in the center that will look like the lattice is climbing up the side.

Be My Neighbor Block 13 at From My Carolina Home

So as usual, I cut all the bits, and found a couple of buttons for the flower center to audition.

Be My Neighbor Block 13 at From My Carolina Home

Marking diagonal lines, chain sew as much as I can.

Be My Neighbor Block 13 at From My Carolina Home

Lather, rinse, repeat.

Be My Neighbor Block 13 at From My Carolina Home

Layout the bits, and sew in sections, again as much as possible to minimize trips to the ironing board.

Be My Neighbor Block 13 at From My Carolina Home

I noticed that I ran out of bobbin thread, and after reloading, I got the leaf blocks sewn on the wrong side.  Oh well, it just means that the solid blocks are on opposite sides from the pattern, something no one will notice.  Not ripping that out!

Be My Neighbor Block 13 at From My Carolina Home

Piecing all together, I placed the flower on the patchwork.

Be My Neighbor Block 13 at From My Carolina Home

Pinning on the bird and the flower, I used the freezer paper method of applique again.

Be My Neighbor Block 13 at From My Carolina Home

It only took me part of an afternoon to get the handwork done.  All the birds will get button eyes, and all the flowers will get button centers once the quilting is done.

Be My Neighbor Block 13 at From My Carolina Home

So, Block 13 completed.  I’m going to have to finish one block a week at least to stay on track.  Next up is Block 14, the sailboat, and I am not going to do a sailboat.  So now I have to figure out what to put in its place.  I’ll do another house of some sort, and I’ll share that with you next week.

What are you working on now?


Sharing

Slow Sunday Stitching

I May Have A Scrap Problem