Showing posts with label SpeedStep. Show all posts

SSDT Editing Guide and Subforum


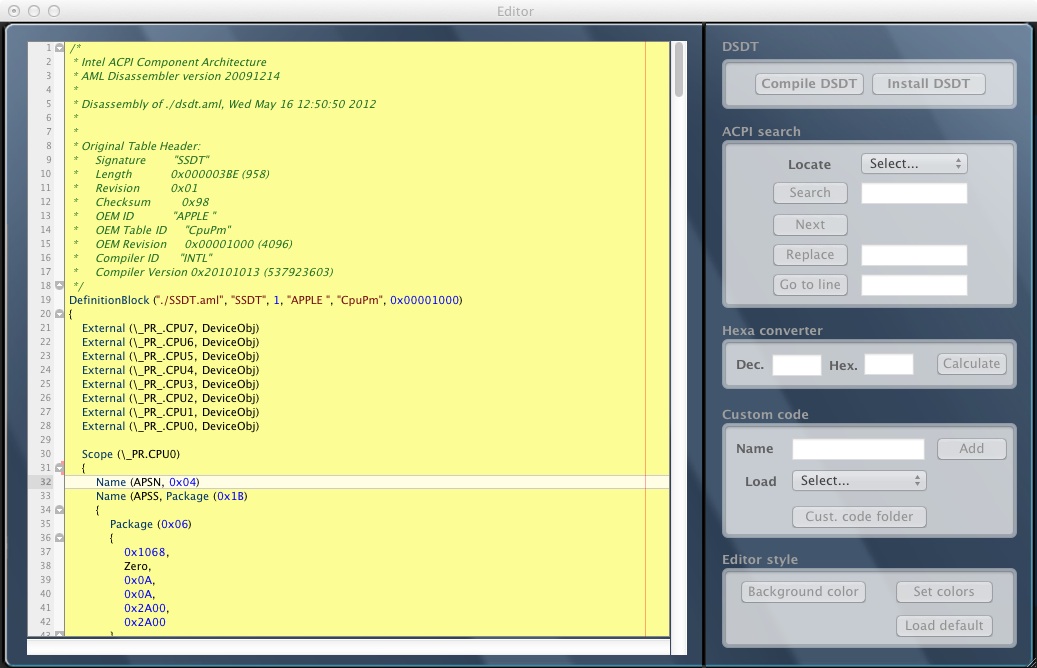
A few days ago, we released a new MultiBeast featuring SSDT files for Sandy Bridge CPUs. To assist with further SSDT editing and customizing, MacMan has written a guide at his blog called Customizing SSDT: Power Management Optimization on 10.7.4. The guide documents what you need to know about the SSDT so you can optimize your Socket 1155 CPU for an overclock greater then the 4.2 GHz supported in MultiBeast.

Good luck! And share your custom SSDTs and results at the new SSDT subforum.

For discussions on this and other topics, register today at tonymacx86.com!

10.7.4 Power Management and Sandy Bridge CPUs

It's been a week since the 10.7.4 update, and an issue has cropped up with Core i5 and i7 Sandy Bridge CPUs. As part of this release, Apple updated the power management drivers. These new drivers are effecting performance, as some CPUs are stuck at a 16x multiplier, thus limiting them to a maximum clock speed of 1.6 GHz. When we discovered the issue, we released a temporary workaround on the tonymacx86.com forum while working on a permanent solution. We are now happy to announce our permanent solution.

SpeedStep is a trademark for a series of dynamic frequency scaling technologies built into some Intel microprocessors that allow the clock speed of the processor oto be dynamically changed (to different P-states) by software. This allows the processor to meet the instantaneous performance needs of the operation being performed, while minimizing power draw and heat dissipation. Enhanced Intel SpeedStep is sometimes abbreviated as EIST.
Source: Wikipedia

The Secondary System Description Table or SSDT is a continuation of the Differentiated System Description Table, or DSDT, allowing the the motherboard manufacturer or OEM to provide the base support in one table (DSDT) and add smaller system options in other tables (SSDT). As such they use the SSDT to provide speed stepping and power configuration.

The Chimera bootloader will either read the SSDT from the motherboard's BIOS/UEFI, use the SSDTs generated by boot keys provided by the MultiBeast UserDSDT boot.plist, or a user provided SSDT. As part of the 10.7.4 update, some Sandy Bridge Socket 1155 i5/i7 CPUs have issues with the BIOS/UEFI SSDT and need a properly edited one to override its configuration. NOTE: Core i3 and i5-2400 CPUs are known to work properly with the BIOS/UEFI SSDT, and don't need this fix.

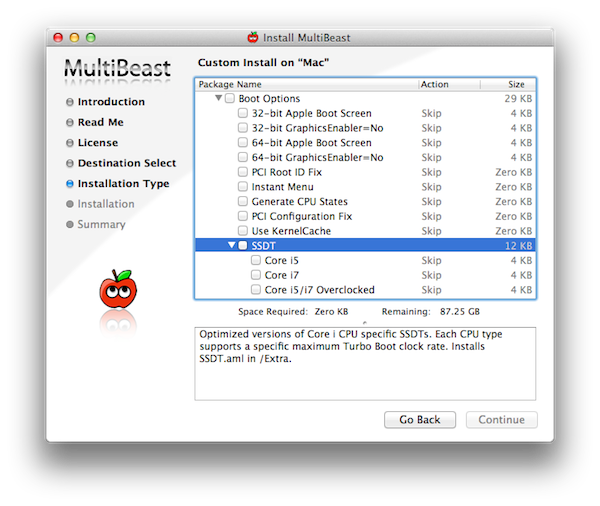
In order to make optimization easy for the average user, we've prepared 3 SSDT files, included in MultiBeast 4.5.0. The first is for Core i5 systems running at stock speeds. The next is for Core i7 systems also running at stock speeds. The final one is for over clocked Core i5 or Core i7 systems. The specific SSDT.aml file installs into the /Extra folder and will initiate SpeedStep properly in 10.7.4. One of these optimized SSDTs are recommended for users of the following CPUs: i5-2500, i5-2500K, i5-2550K, i7-2600, i7-2600K, i7-2700K.
After installing one of these SSDTs you can verify that SpeedStep is working on Sandy Bridge CPUs by installing Project OS X's new FakeSMC, FakeSMC Plugins, and HWMonitor app, available in the latest MultiBeast. After installation of these files, launch HWMonitor and click the live cpu Frequencies and Multiplier to view in the menubar as shown below. Keep in mind that Turbo frequencies will not appear.


Special thanks to Greggen and everyone in the community for sharing their knowledge- testing and editing SSDTs in the past week. We're interested in any feedback using these new tools. Please add your comments and results in this thread and in the brand new SSDT subforum.

For discussions on this and other topics, register today at tonymacx86.com!

MultiBeast 4.5 Update

Today MultiBeast was updated to version 4.5 for Lion. The latest version of MultiBeast is now available at tonymacx86.com/downloads.

Please do not upload or redistribute MultiBeast to any other sites. 

What's new in MultiBeast 4.5:
  • Added Customization -> Boot Options -> SSDT
  • Added Core i5 to Customization -> Boot Options -> SSDT
  • Added Core i7 to Customization -> Boot Options -> SSDT
  • Added Core i5/i7 Overclocked to Customization -> Boot Options -> SSDT
  • Added netkas ATI 48xx Patch for 10.7.4 to Graphics -> ATI 48xx Support.
  • Updated ALC8xxHDA to v2.0.3
    • Adds mute for Realtek ALC892
  • Updated Patched AppleHDA for Realtek ALC887 with bug fix
If you have Bug Reports or Feature Requests, please let us know in the MultiBeast section of the forum.

-tonymacx86 & MacMan
For discussions on this and other topics, register today at tonymacx86.com!

MultiBeast 4.3 Update

Today MultiBeast was updated to version 4.3 for Lion. We've added a new Combo OpenCL Enabler, which when combined with Chimera 1.8 will enable full QE/CI and OpenCL for all NVIDIA GeForce 4xx and 5xx graphics cards. Two more big additions are the flAked SpeedStepper for UEFI power management fixes, and maolj's Atheros ethernet driver. The latest version of MultiBeast is now available at tonymacx86.com/downloads.
Please do not upload or redistribute MultiBeast to any other sites. 

What's new in MultiBeast 4.3...
  • Updated Chimera to v1.8.0
  • Renamed NVIDIA GF100 Fermi Patches to NVIDIA 4xx/5xx Support
  • Renamed OpenCL Enabler 10.7.0 / 10.7.1 to 10.7.0 / 10.7.1 netkas OpenCL Enabler
  • Removed OpenCL Enabler 10.7.2
  • Added 10.7.2 / 10.7.3 Combo OpenCL Enabler. 
    • This new enabler contains the functionality from the old OpenCL Enabler plus adds cmf's OpenGL patch and MacMan's patch to add the missing NVIDIA device IDs. 
    • NOTE: ONLY for native Apple-released graphics drivers, NOT for the older NVIDIA Official Drivers for Quadro released here.
  • Renamed ATI 48xx Patches to ATI 48xx Support
  • Moved ATI 48xx Device Injector to ATI 48xx Support -> ATI 48xx Device Injector
  • Renamed all ATI 48xx Patch for 10.7.x to 10.7.x netkas ATI 48xx Patch
  • Added 10.7.3 netkas ATI 48xx Patch for 10.7.3 to Graphics -> ATI 48xx Support
  • Added flAked SpeedStepper to Drivers & Bootloaders -> Kexts & Enablers -> Miscellaneous
  • Added maolj's AtherosL1cEthernet to Drivers & Bootloaders -> Kexts & Enablers -> Network
  • Removed OSx86 Software. 
    • The programs in this choice are now available for download here.
  • Added 10.7.2 / 10.7.3 Combo OpenCL Enabler to EasyBeast and UserDSDT installs.
  • Changed npci=0x2000 to npci=0x3000 for all kernel flags.
  • Removed backup function from any script that was backing up and patching kexts.
  • Updated IntelCPUMonitor to v1.0.1 rev505
If this utility has helped you, please consider a contribution to support further MultiBeast development. Thanks in advance, and enjoy! If you have Bug Reports or Feature Requests, please let us know in the MultiBeast section of the forum.

-tonymacx86 & MacMan
For discussions on this and other topics, register today at tonymacx86.com!

tonymacx86 Table Of Contents


Ok, so you've installed Snow Leopard. What can you do next to further tweak your system? I tried to pull together some of my most relevant posts in a sort of Table Of Contents. This is not meant to be an order of operations, although you can use it like that.

The posts below represent how we got to where we are now step by step. A good read for anyone new to the world of OSx86. I'll try to keep this post updated. Thanks for reading!

Installation Guides
  1. iBoot + MultiBeast: Install Mac OS X on any Intel-based PC  (RECOMMENDED)
  2. Old Boot CD Method
  3. OSInstall.mpkg Method
  4. USB Method
  5. Dual Boot Windows 7 and OS X Snow Leopard

Post-Installation Guides
  1. MultiBeast: The Ultimate Post-Installation Utility
  2. Enable High Definition Audio on P55 Motherboards
  3. Enable Full Graphics Card Acceleration
  4. Tweaking Your System: Install Chameleon, DSDT, & Extras to EFI Partition
  5. Tweaking Your System: Get Rid of PlatformUUID.kext
  6. Tweaking Your System: Get Rid of Restart Kexts
  7. How To Install Chameleon Manually From Terminal
  8. Create a Chameleon Boot USB Drive
  9. Enable the Apple Boot Screen
  10. Fit Mac OS X Snow Leopard on a Single Layer DVD

DSDT Guides
  1. DSDT Database for P55 Motherboards
  2. Create and Modify Your DSDT.aml
  3. Advanced DSDT Fixes: Enable Sleep on P55 Motherboards
  4. Advanced DSDT Fixes: Enable Intel Native SpeedStep on P55 Motherboards
  5. Advanced DSDT Fixes: nVidia Graphics
For discussions on this and other topics, register today at tonymacx86.com!

Advanced DSDT Fixes: Enable Native Intel SpeedStep on P55 Motherboards

NOTE: This guide is somewhat outdated- in order to enable SpeedStep for Core i5 750 and Core i7 860, all you need to do is use iMac11,1 smbios.plist.  It's available in Multibeast.  

By adding correct SSDT.aml code to your DSDT, you can enable the native Intel SpeedStep technology of your CPU in Mac OS X. According to Wikipedia, "SpeedStep is a trademark for a series of dynamic frequency scaling technologies (including SpeedStep, SpeedStep II, and SpeedStep III) built into some Intel microprocessors that allow the clock speed of the processor to be dynamically changed by software. This allows the processor to meet the instantaneous performance needs of the operation being performed, while minimizing power draw and heat dissipation."

This is not a necessary fix, but you can gain noticeable power savings and/or performance gains. This fix may also extend the life of your hardware by enabling OS X to use advanced features that your Intel CPU was made for.

I added a new set of edits to the tonymacx86-DSDT-FIXES.dsl with speedstep information for the Core i5 750 and Core i7 860. Simply download the updated tonymacx86-DSDT-FIXES.zip, search for SpeedStep, and you'll find code additions for your CPU. You can copy and paste the CPU information from there. The example P55M-UD2 DSDT included has SpeedStep fixes, as well as every other edit that is referenced.

If you're feeling adventurous, you can check the values of your own CPU and make the edits yourself. The easiest way to view this information is to-open DSDTSE, go into the sidebar, and choose SSDT.aml, For example, the edits are made as in the pictures below. The left hand code is from the UD2 SSDT.aml, and the fixed code is on the right. You can then see the values to use when editing. Use the DSDT-FIXES guide for the rest of the code block.


You can check to see if your DSDT is working correctly by using the free application MSR Tools. In order for it to run, you must start up Snow Leopard in 32-Bit mode. Restart your computer, pause the Chameleon countdown and type arch=i386. Download it here.

WARNING: Improper use of SpeedStep code in your DSDT can cause major problems with your system including hardware damage and failure. Again, you do not need to do this fix for a stable system. If you're having any issues, take the SpeedStep code out immediately and reboot. Also, do NOT overclock with SpeedStep- it's known to cause performance decreases. Use with care!

Special thanks to the Insanelymac P55 Thread for the Core i7 edits!

SPEEDSTEP EXAMPLES: Due to popular demand, here is a zip of 2 versions of the GA-P55M-UD2 DSDT- 1 with Core i5 750 SpeedStep and the other with i7 860 SpeedStep. Use these as an example to modify your own DSDT, or if you have a GA-P55M-UD2, you can use this, but be sure to use the correct version! Have fun!
tonymacx86 DSDT-P55M-UD2 - SpeedStep

For discussions on this and other topics, register today at tonymacx86.com!