Showing posts with label easter. Show all posts

Monday, March 30, 2015

Chocolate Hot Cross Bun Recipe


I love baking, love it. But for some reason when it comes to hot cross buns I usually buy them from the bakery or supermarket.

But this weekend we had a bit of free time so I whipped up some myself taking an old traditional hot cross bun recipe and modifying to add chocolate chips, removing all that unnecessary dried fruit and changing the bun into a chocolate bread with a lightly fragrant cinnamon base.

Deliciously perfect just baked Chocolate Hot Cross Buns

I don't know why it took me so long, look at that picture, delicious just baked softly fragrant buns and oh my goodness the house smells even better than those buns look.

Plus it cost me way less than the bakery ones, so economical as well.

They were super easy as I used my stand mixer's dough hook attachment and saved about 10 minutes time of hand kneading, although don't worry, the recipe will work out just fine hand kneading if you don't have a dough hook/stand mixer.


I find the key things for successful baking with yeast is to not overheat and to prove the yeast prior to mixing into the other ingredients. Oh and time, you can't really rush it, I made the ones in the picture in about 2 1/2 hours including rising and baking time but I would normally set aside at least 3 hours.

Chocolate Hot Cross Bun Recipe makes 12 large hot cross buns
I use premix royal icing mixed with water to a piping consistency.

2 X 7g packets yeast 14g total (1/2 oz total)
1 tsp caster sugar
3/4 cup milk (6 fl oz)
50 g unsalted butter (1 3/4oz) melted/softened
1 large egg
1/2 cup milk (4 fl oz) extra
525 g plain (18 1/2 oz all purpose flour)
70 g caster sugar (2 1/2 oz)
25 g cocoa (7/8 oz)
2 tsp ground cinnamon
1/4 tsp salt
230 grams chocolate chips (8 oz)  # the baking kind that hold shape.
1/2 cup royal icing mixed with  1/2 tsp cocoa and 1/4 tsp cinnamon.

Put milk in microwave safe jug and heat in microwave for around 15- 20 seconds at high so that it is warm to touch (not hot). Using a fork whisk in yeast and 1 tsp sugar and allow to sit around 10 mins until needed.

The yeast should froth up like this

Sift the flour, cocoa, remaining caster sugar, cinnamon and salt together and set aside until required.

In the bowl a large stand mixer with a scraper beater attachment or regular beater, place the butter, egg and 1/2 cup milk and mix for 30 seconds at low speed. Add the yeast mixture and mix another 10 seconds, then add the sifted flour mixture and beat at low speed until all the dry mixture has been incorporated. The mix will be quite sticky.

Switch to a dough hook and mix at medium low speed for a couple of minutes until the mixture is smooth and elastic.* If you do not have a stand mix and dough hook you can knead by hand for around 10 minutes.

Spray a large bowl with oil, place the dough into the bowl, cover with plastic wrap and pop in a warm place to rest for around 1 to 1 1/2 hours until the mixture has doubled in size. I use my oven and turn it up to 50C for a few minutes then turn it off before placing the bowl into the oven, if required I turn the oven light on. It should be just warm not hot.

Once the dough has risen remove from bowl, punch it down and mix in the chocolate chips quickly. I used baking chips which do not melt very quickly, the higher quality chocolate will melt and become a sticky mess.

Dough should be smooth and flexible

Lightly spray a baking tray around 20cm X 30 cm with oil. Shape the dough into 12 even rolls and place into the tray. Cover with plastic wrap and allow to rest/rise for 30 minutes.

Heat the oven to 190 C (fan forced). Remove the plastic wrap from baking tray and pop the buns in the oven for 10 minutes, reduce the heat to 160 C and cook for a further 20 minutes.

Allow to cool a little. Pop the royal icing into a zip lock bag, cut a small hole in the corner and pipe crossed onto the top of the buns.

Best served immediately although still good next day. Store in airtight container at room temperature.


Linda Vandermeer is a blogger, baker, maker and author of the cookbook ' Sweets on a Stick': More than 150 kid friendly recipes for cakes, candies, cookies and pies on the go!. Published in the US the book is available at most online book stores.

Affiliate links may earn me money and contribute to supporting this blog.

Original Ideas, photography and recipes by Linda Vandermeer do not reuse without permission. 

Cute dress from Target Australia

Sunday, March 8, 2015

Woodland party cake


I can not believe how long it has taken me to share all these pictures of the sweet woodlands party cake. I made it almost a year ago for my niece's 10th birthday. It is approx 6" by 6" high.

At the time I was playing around with some freeze dried fruit powder and I painted the cake with a mix of powdered raspberry mixed with rose spirits, lemon powder and some gel food colours.

I love the textured look that I achieved by rubbing in extra powder after hand brushing the cake.


I decided to apply the colour in quite a rough organic way, see below for example, and then my design was guided a little by the underlying colours, like a natural landscape.


The design centered on the mason jar party light idea I had so I started by drawing on my string with an edible pen (AmeriColor 2 Pack Gourmet Food Writer Set, Black Marker ) then I cut out pink and blue fondant by hand and a little grey for the lids and drew on a little line at the corner and popped the jars on the cake. Later on I used a little royal icing to pipe a little line of white on the side to look like reflected light.

I rolled out some chocolate flavored fondant to make the poles and shaped the birdies. Then I used some cloud cutters to make the white clouds, mine are from Cakes by Bien (see below for details).  To get them looking fluffy I rolled out the white fondant quite thick and then popped some plastic food wrap over the top then pressed the cutter down, see in the picture how it makes the edges look a bit rounded instead of being sharp and defined.

The cloud cutters were quite handy as I also used them for the trees and bushes.

I also hand cut the deer (as someone else was using my little Cakes by Bien Deer Aimee cutter which would have been perfect).


Okay instead of explaining every step I pretty much I hand cut everything without a template except the flowers and cloud cutters. Any of the white detail is piped royal icing (except the clouds and flowers) and the black is edible pen.

Tip. when applying the flowers, cut them out, keeping them in the plunger cutter, apply a little water or edible glue on the spot you want them and then push them out onto the cake using the plunger center to gently adhere them to the cake.

Inside the cake was strawberry cake with vanilla Italian Meringue Buttercream.


I prefer Americolor food writer pens. I used Bakels chocolate and white fondant and Satin Ice red fondant and Queens premix royal icing.


 Cloud cutters - used for clouds, trees and bushes - Cakes by Bien


Linda Vandermeer is a blogger, baker, maker and author of the cookbook ' Sweets on a Stick': More than 150 kid friendly recipes for cakes, candies, cookies and pies on the go!. Published in the US the book is available at most online book stores.

Affiliate links may earn me money and contribute to supporting this blog.

Original Ideas, photography and recipes by Linda Vandermeer do not reuse without permission. 


Thursday, April 17, 2014

How to make pretty chocolate Easter eggs

(How to decorate pretty Easter eggs tutorial down below)

Easter is almost here so I thought it would be fun to decorate some homemade Easter eggs.


These eggs are for non-chocolatier people like me. No fancy tempering the chocolate and the edges are a bit messy.

But what they lack in perfection they make up in charm and the kids sure didn't notice any problems with them.


I made a few in dusty pink and soft mint green, decorated them with some sugar flowers and then bribed the kids with the eggs so I could get a couple of nice pictures.


Oh how sweet is that old basket they are holding, I've had it for years and years. I may have even got it from the Easter Bunny when I was a little girl :)


The Destroyer even joined in, see that is I can believe I have to hold these eggs when I really want to be eating them face.

Easter egg moulds can be found for a very reasonable price in discount and dollar stores around Easter.

How to make pretty Easter eggs
These eggs are quite delicate and not really suitable for very warm weather, if you do a double layer of chocolate they will be a bit more stable. Can be made 1 week ahead of time and stored in a cool place.

Here is a quick free video tutorial showing how I made them, for written step by step instructions, plus links to the fondant flower see below:


Ingredients and Equipment

White chocolate melts  (US - these are actually white chocolate not candy melts)
Oil based food color (or gel food color and Flo-Coat)*
#optional - Oil based raspberry essence
Egg Mould
Sugar Flowers (see below for links to tutorials)
Royal Icing

How to make Blue fondant Flowers Tutorial CLICK HERE for link
How to make Easy Sugar Blossoms CLICK HERE for link

Place the white chocolate in a microwave safe bowl and melt at medium low heat in the microwave for 2 minutes. Make sure the heat is low otherwise the chocolate may seize and become unusable. Remove from microwave and stir for 30 seconds. If required return to microwave and heat at medium low heat for another 1 minute, then remove and stir until smooth. Continue until all the chocolate is melted.


To color the chocolate add a drop or 2 of oil based food color. You can not use regular water based food color* or the chocolate will sieze and become unusable.

*To make gel food color suitable to use with chocolate, add 1 drop food color to 11 drops flo-coat, mix until well combined and then add to the melted chocolate.

Optional - If you would like to flavor the chocolate add a few drops of the raspberry oil essence.

Spoon melted chocolate into the egg mould, using the back of your spoon to ensure the chocolate comes up to the edge and then tap sharply on the workbench quite a few time to bring any air bubbles out. Most of the chocolate will have pooled in the center of the mould, so use the back of your spoon to push it back up to the edges making the chocolate coverage as even as possible. Run a knife around the top to ensure that the edge of the egg is even.


Pop the mold into the freezer for a few minutes until the chocolate is completely set.

Remove the mould from the fridge, gently pull the mould away from the chocolate at the edges and then turn the mould over. The chocolate should release easily. If it happens to crack don't worry just remelt the chocolate and start again.


Using royal icing attach flowers or decorations as desired. I added 3 large blue fondant flowers and 3 smaller sugar blossoms to these pink eggs.


Gently join the eggs together using extra melted chocolate, the edges may look a little uneven, you can carefully press extra chocolate into the gaps rubbing over the top to smooth the chocolate, or add ribbon to hide the seam.


Linda Vandermeer is a blogger, baker, maker and author of the cookbook ' Sweets on a Stick': More than 150 kid friendly recipes for cakes, candies, cookies and pies on the go!. Published in the US the book is available at most online book stores.

Affiliate links may earn me money and contribute to supporting this blog.

Original Ideas, photography and recipes by Linda Vandermeer do not reuse without permission. 


Sunday, April 13, 2014

10 fun DIY homemade Easter treats

I've rounded up 10 of my favourite Easter inspired treats from the Bubble and Sweet blog. From a show stopping ruffle cake and delectable macaron treats, to easy make fudge and muffins there is sure to be something fun and delicious to tempt everyone.

To find the recipes in the original blog posts click onto the links under the photo's.

(Clockwise from top left)
Spring Inspired Easter Cake with recipe for Lemon and Poppy Seed cake included (CLICK HERE)
Blue speckled Robin egg cake truffles (CLICK HERE)
Creme Egg macaron recipe (CLICK HERE)
Easter egg macaron inspiration includes link to macaron recipe (CLICK HERE)
Pastel Rainbow Ruffle Cake (Ruffle decorating Instructions CLICK HERE)
Bunny food fudge (RECIPE CLICK HERE)

(Clockwise from top left)
Hot cross bun cake pops (Instructions CLICK HERE)
Easter inspired nest cupcake toppers (Instructions CLICK HERE)
Coconut Easter Eggs (Recipe CLICK HERE)
Chocolate Chip Hot Cross Bun Muffin (RECIPE CLICK HERE)


Linda Vandermeer is a blogger, baker, maker and author of the cookbook ' Sweets on a Stick': More than 150 kid friendly recipes for cakes, candies, cookies and pies on the go!. Published in the US the book is available at most online book stores.

Original Ideas, photography and recipes by Linda Vandermeer do not reuse without permission. 


Saturday, April 5, 2014

Bunny food fudge


Oh my goodness I love bunnies. LOVE THEM, they are sooo cute! But sadly they are banned as a pet in my state, I guess 'cause word has it they breed like rabbits.

So no bunnies for me :(


But I'm not one to dwell on stuff I can't have so I've moved on and I created a recipe for bunny food fudge instead.

The fudge is a white chocolate and marshmallow base which I have flavored with a little raspberry.

And then colored yellow - I know, bit weird......I guess you can color the fudge a light pink instead of yellow or leave the raspberry out ( it will still taste good without the raspberry flavor). But it worked for me like this, I like raspberry and the yellow looked so pretty with my bunny ♥.


I've used the crispy M&M Easter eggs from Australia for my fudge as that is what I had sitting around. In the US you can use the Speck-Tacular egg range for a similar result, or actually pretty much any Easter eggs you have on hand.

Of course as an extra bonus this fudge will be perfect after Easter to use up any left over eggs you may have laying around.


Bunny Food Fudge
Makes 20 large pieces or 60ish small pieces - the ones in the picture are large. Once cut M&M eggs can start to lose their 'crispness'. I store mine in an airtight container and cut pieces off as required.
 
200g (7oz) white marshmallows 
1 1/2 cup white sugar
2/3 cup evaporated milk (not low fat)
1/4 tsp salt
500 g (18 oz ) white chocolate chopped into very small pieces
1/2 tsp raspberry essence*
 few drops yellow food colour (I use gel food colour) 
packet Easter eggs (I used M & M speckled eggs with crispy centre)
1 cup marshmallows extra cut into quarters (or mini marshmallows) for top

*do a taste test as there is a big variance between different brand and types of essences I used raspberry oil concentrate and only added 1/4tsp.

Line a 20cm X 20cm (8" X 8") square tin with foil.

Place the white chocolate into a largish bowl and melt in microwave at 50% heat for 3 minutes. Allow to rest a couple of minutes and then stir until smooth.

Pop 200 grams (7oz) marshmallows, sugar, evaporated milk and salt into a saucepan on medium low heat, stir until the marshmallows melt. Stir the mixture over the heat for another 5 to 7 minutes, do not allow it to boil.


Pour the marshmallow mixture into the bowl with white chocolate, add raspberry essence and yellow food colour and mix well until combined and the mixture starts to thicken.

Spoon the mixture into the prepared tin using the back of the spoon to level the mixture until it looks pretty smooth.

Press in the extra marshmallows and the Easter eggs. Add as much or as little as you like and then lightly press them onto the fudge to ensure they stick.

Cover with plastic wrap and leave overnight to set.

Store in an airtight container for up to 1 week.


Linda Vandermeer is a blogger, baker, maker and author of the cookbook ' Sweets on a Stick': More than 150 kid friendly recipes for cakes, candies, cookies and pies on the go!. Published in the US the book is available at most online book stores.

Original Ideas, photography and recipes by Linda Vandermeer do not reuse without permission. 


Tuesday, April 1, 2014

Spring inspired Easter cake and Lemon and Poppyseed cake recipe


OK I know I normally go overboard with ruffles, and ribbons and well pretty much everything. But this time I decided to go simple.


Y'know and let the delicious lemon and poppy seed cake speak for itself.

I've popped the recipe for this cake below so you can try it out yourself. To decorate, just layer the cakes up pop on a crumb coat, make sure the top is even/flat and using a stiff butter cream apply the yellow butter cream around the edge with an offset spatula (or butter knife) using long even upwards strokes.

OK it's a little bit trickier than I made it sound but you get the picture.


I have a skewer in the center, and I chilled the cake in between adding each layer. Oh plus I cut off the brown edges of the cake so it looks nice in the picture (y'all don't have to do that).

Then 'cause it's Easter soon I added some little speckled chocolate eggs.

I'm hoping to pop up a youtube video soon making up a layer cake, I've just been an insy bit sick lately.

Oh and if simple is just not your thing then below is my Easter cake from a couple of years back


Lemon and poppyseed cake 
Cake in pictures baked in 6" tins. To make a cake as tall as the picture you will need 1 plus another 1/2 batch of this recipe which will make a total of 6 layers.  The cake can also be baked in one 8" tin for 1hr.

Cake in picture is filled with alternate layers of butter cream and  homemade lemon curd/ butter.
 
300g flour (10 5/8oz)
1 Tbsp (1 US Tbsp + 1 tsp) Baking powder
100 g (3 1/2 oz) almond meal (ground almond)
40 g (1 3/8oz) poppy seeds
170g (6oz) unsalted butter room temp
230g (8oz) caster sugar (or regular granulated white sugar)
Grated rind from 2 lemons
4 large eggs
170g (6oz) low fat yogurt (I used Chobani plain)
1/2 cup low fat milk

Line pans and preheat oven to 180 C (170 C fan forced) (350 F).

In large bowl sift together flour, baking powder and almond then mix in poppy seeds pop aside.

In a separate bowl combine milk and yogurt and set aside.


Using electric mixer cream  butter and sugar together at high speed until light and fluffy (a couple of minutes).

Reduce speed to medium low and mix in eggs one at a time, scraping down sides as required.  Add the lemon rind.


Reduce speed to low and add 1/3 of the flour mixture mixing until just combined. Scrap down sides and add half of the milk mixture once again mixing at low speed until just combined. Repeat process adding flour, milk and then finishing with the flour mixture.

Divide mixture evenly between 2 tins, place in the middle rack of preheated oven and bake for approx 50 mins or until the top is golden and a skewer inserted into cake comes out dry.


Linda Vandermeer is a blogger, baker, maker and author of the cookbook ' Sweets on a Stick': More than 150 kid friendly recipes for cakes, candies, cookies and pies on the go!. Published in the US the book is available at most online book stores.

Original Ideas, photography and recipes by Linda Vandermeer do not reuse without permission. 


Saturday, March 23, 2013

Easter is coming - Easter Egg Macarons


Easter is coming, in fact it's pretty much nearly here.

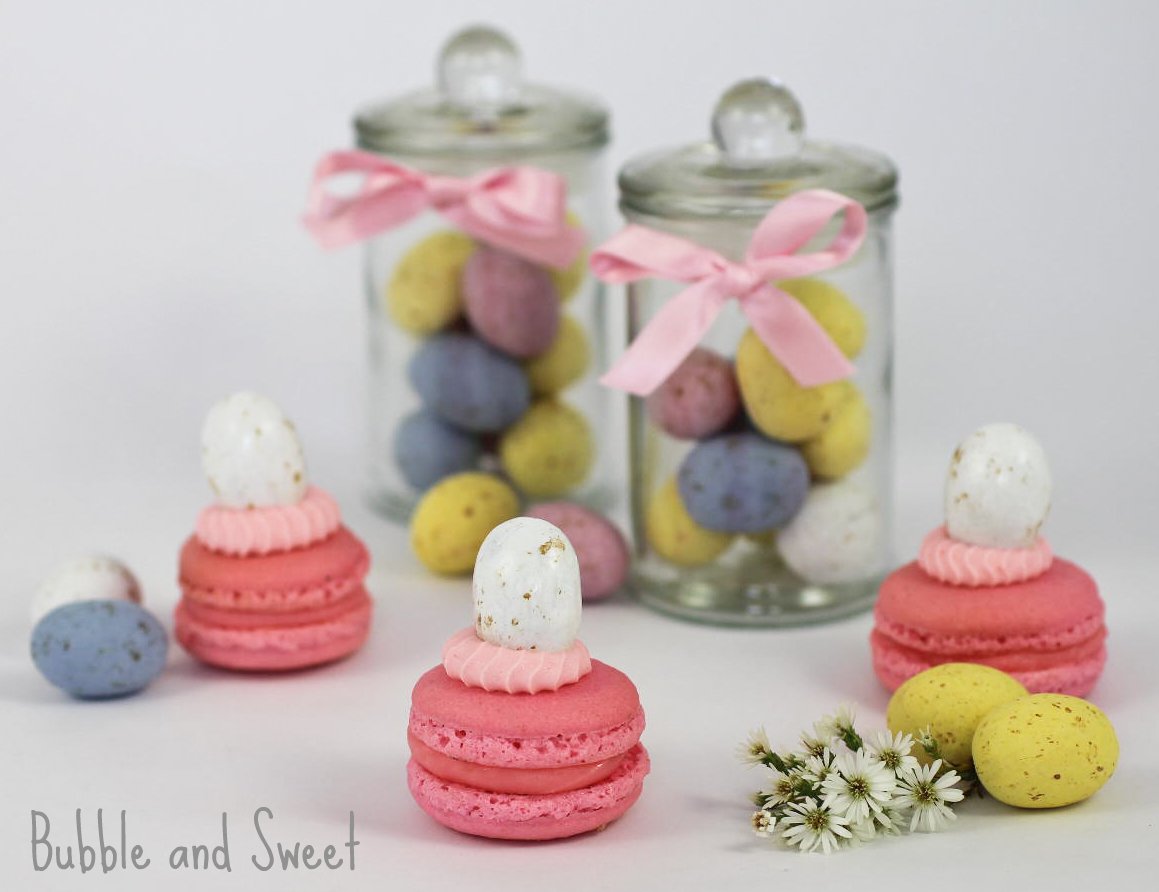
I can hardly believe it this year is rushing past, so to get me into gear I've popped some Easter eggs onto my macarons to make Easter macarons.


These were a couple of reject left over macrons from a batch I made someone. The shell sizes didn't quite match, I didn't pipe the raspberry ganache quite right. They were delicious but just a touch less than perfect.


But with the little eggs on the top no one will notice. Well not my kids anyway.

To make up some similar yourself, make or buy a batch of macarons (CLICK HERE for my recipe to make your own) take a little ganache and whip it until it is light and fluffy (CLICK HERE for white chocolate whipped ganache recipe, you will need about a quarter or less depending on how many macarons you have).


Then pipe a dot of ganache onto the top of the macaron and push an Easter egg into the ganache, you might need to hold it a second.

I stuck mine into the fridge to set up for a while.


The eggs I used were chocolate eggs with a thin candy coating but you could use any type you like.

Oh and make sure to keep an eye out for a special post I have coming out in a couple of days where I have joined up with some other lovely Blogs and then next weeks post will be a couple of days late so I can have a rest for Easter as well. I'm all over the place at the moment :)


Linda Vandermeer is a blogger, baker, maker and author of the cookbook ' Sweets on a Stick': More than 150 kid friendly recipes for cakes, candies, cookies and pies on the go!. Published in the US the book is available at most online book stores:

Link to Amazon:

Or at Fishpond (free shipping Australia)
Sweets on a Stick: More Than 150 Kid-Friendly Recipes for Cakes, Candies, Cookies, and Pies on the Go!