Approximately 62 percent of today’s internet traffic is made up of images. Media-rich websites must ensure that all images are optimized to speed up the site. A faster site will make your visitors happy; and when they are happy you will likely see increased conversion rates.
In this article, we’ll take a look at how to perform and implement image optimization in Python.
First let’s examine why image optimization matters.
Why Optimize Images?
- SEO: The speed of your website is an important ranking and engagement factor. If your images are optimized, your site will be faster. Your site’s load time and overall size have a direct impact on your search engine rankings.
- Storage: Optimizing your images result in reduced image file sizes, which in turn reduces the amount of storage space needed to house your images.
- Bandwidth: Optimizing your images will save a lot of bandwidth. Reduced bandwidth usage lowers costs of your hosting plan and will automatically save your users some amount in the costs of data used for browsing your website.
Optimizing Images in Python
Pillow
Pillow is a fork of the the Python Imaging Library, which builds on PIL by adding more features and support for Python 3. It supports different file formats, such as PNG, JPEG, PPM, GIF, TIFF and BMP.
You can install it like so:
Pip install pillow
Easily resize an image:
from PIL import Image
image = Image.open('dog.jpg')
newImage = image.resize(300, 300)
newImage.save('dog_300.jpg')
The piece of code above resizes the image to 300x300.
You also can resize images and keep their aspect ratio by using thumbnails like so:
from PIL import Image
image = Image.open('dog.jpg')
image.thumbnail(300,300)
image.save('dog_thumbnail.jpg')
And you can convert an image into another format by saving the new image with the a new type:
from PIL import Image

image = Image.open('dog.jpg')
image.save('new_dog.png')
img4web
This is a Python script that optimizes .jpg, .png and animated .gif images on the web. The script produces a lossless optimization for the images. A small size saving for each image, but it speeds up the load time of web pages and reduces the bandwidth cost for a website.
smush.py
This is a Python command line tool that is an implementation of Yahoo’s smush.it. It is a lossless image optimizer script for displaying images on the web.
The following lossless optimizations are performed:
- GIFs - If they're animated GIFs, they are optimized with Gifsicle. If they aren't animated, they're converted to PNGs with ImageMagick, then optimized as PNGs, which we show later in the article.
- PNGs - Quantized with pngnq, then crushed with pngcrush.
- JPEGs - You can optionally remove ALL metadata. If they're larger than 10kb, they're converted to progressive JPEGs. Compression is optimized with jpegtran.
Run it over a collection of existing images like so:
python smush.py /path/to/file/or/directory(ies)
Tinify
Tinify is a Python package that enables you to compress and optimize JPEG and PNG images using the Tinify API. Install the package like so:
pip install --upgrade tinify
You can upload any JPEG or PNG image to compress it:
source = tinify.from_file("before_optimization.jpg")
source.to_file("optimized.jpg")
Upload an image from a buffer and get the compressed image data:
with open("unoptimized.jpg", 'rb') as source:
    source_data = source.read()
    result_data = tinify.from_buffer(source_data).to_buffer()
You can resize images:
source = tinify.from_file("large.jpg")
resized = source.resize(
    method="fit",
    width=150,
    height=100
)
resized.to_file("thumbnail.jpg")
Tinify has method “scale”, “fit” and “cover”.
Scikit-image
Scikit-image is an image process library in Python. It provides a versatile set of image processing routines. Install:
pip install scikit-image
It provides a lot of functions for optimizing and transforming your images, such as rescale, resize and others. Check out the documentation.
Other good options are PythonMagick, and Wand (ctypes-based simple ImageMagick binding for Python).
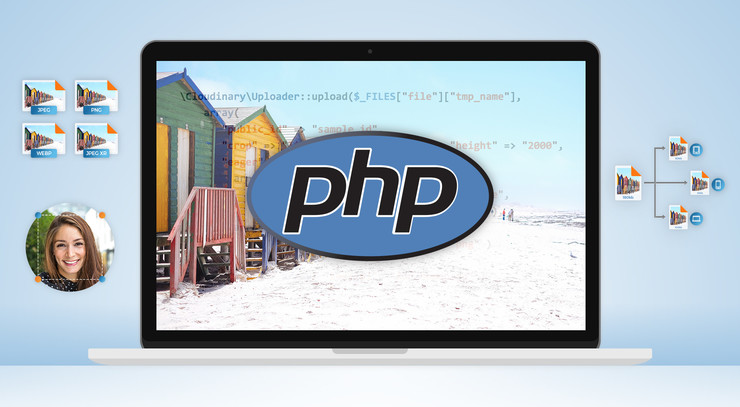
Cloudinary: An Easy Optimization Alternative
Cloudinary is a cloud-based service that provides an end-to-end image and video management solution including uploads, storage, administration, image manipulation and delivery.
Using Cloudinary, you can quickly and easily optimize your images, regardless of the programming language. Cloudinary automatically performs certain optimizations on all transformed images by default. Its integrated, fast CDN delivery also helps to get all the image resources to your users quickly. Cloudinary offers:
Automatic quality and encoding: Using the q_auto parameter, the optimal quality compression level and optimal encoding settings are selected based on the specific image content, format and the viewing browser. The result is an image with good visual quality and a reduced file size. For example,
cl_image_tag("woman.jpg", :quality=>"auto")
cl_image_tag("woman.jpg", array("quality"=>"auto"))
CloudinaryImage("woman.jpg").image(quality="auto")
cloudinary.image("woman.jpg", {quality: "auto"})
cloudinary.url().transformation(new Transformation().quality("auto")).imageTag("woman.jpg")
cl.imageTag('woman.jpg', {quality: "auto"}).toHtml();
$.cloudinary.image("woman.jpg", {quality: "auto"})
<Image publicId="woman.jpg" >
        <Transformation quality="auto" />
</Image>
<cl-image public-id="woman.jpg" >
        <cl-transformation quality="auto">
        </cl-transformation>
</cl-image>
cloudinary.Api.UrlImgUp.Transform(new Transformation().Quality("auto")).BuildImageTag("woman.jpg")

You also can use q_auto:best, q_auto:low, q_auto:good or q_auto:eco to adjust the visual quality of your images.
Automatic transformation: The f_auto parameter enables Cloudinary to analyze the image content and select the best format to deliver. For example, it can automatically deliver images as WebP to Chrome browsers or JPEG-XR to Internet Explorer browsers, while using the original format for all other browsers. Using both f_auto and q_auto, Cloudinary will still generally deliver WebP and JPEG-XR to the relevant browsers, but might deliver selected images as PNG-8 or PNG-24 if the quality algorithm determines that as optimal.
Resizing and cropping images with w and h parameters: Using the width and height parameters in URLs, you can resize the images with Cloudinary:
cl_image_tag("sample.jpg", :width=>0.5, :crop=>"scale")
cl_image_tag("sample.jpg", array("width"=>0.5, "crop"=>"scale"))
CloudinaryImage("sample.jpg").image(width=0.5, crop="scale")
cloudinary.image("sample.jpg", {width: "0.5", crop: "scale"})
cloudinary.url().transformation(new Transformation().width(0.5).crop("scale")).imageTag("sample.jpg")
cl.imageTag('sample.jpg', {width: "0.5", crop: "scale"}).toHtml();
$.cloudinary.image("sample.jpg", {width: "0.5", crop: "scale"})
<Image publicId="sample.jpg" >
        <Transformation width="0.5" crop="scale" />
</Image>
<cl-image public-id="sample.jpg" >
        <cl-transformation width="0.5" crop="scale">
        </cl-transformation>
</cl-image>
cloudinary.Api.UrlImgUp.Transform(new Transformation().Width(0.5).Crop("scale")).BuildImageTag("sample.jpg")

cl_image_tag("sample.jpg", :height=>200, :crop=>"scale")
cl_image_tag("sample.jpg", array("height"=>200, "crop"=>"scale"))
CloudinaryImage("sample.jpg").image(height=200, crop="scale")
cloudinary.image("sample.jpg", {height: 200, crop: "scale"})
cloudinary.url().transformation(new Transformation().height(200).crop("scale")).imageTag("sample.jpg")
cl.imageTag('sample.jpg', {height: 200, crop: "scale"}).toHtml();
$.cloudinary.image("sample.jpg", {height: 200, crop: "scale"})
<Image publicId="sample.jpg" >
        <Transformation height="200" crop="scale" />
</Image>
<cl-image public-id="sample.jpg" >
        <cl-transformation height="200" crop="scale">
        </cl-transformation>
</cl-image>
cloudinary.Api.UrlImgUp.Transform(new Transformation().Height(200).Crop("scale")).BuildImageTag("sample.jpg")

It maintains the aspect ratio, but resizes the image to whatever height and width you desire.
cl_image_tag("sample.jpg", :width=>200, :height=>100, :crop=>"scale")
cl_image_tag("sample.jpg", array("width"=>200, "height"=>100, "crop"=>"scale"))
CloudinaryImage("sample.jpg").image(width=200, height=100, crop="scale")
cloudinary.image("sample.jpg", {width: 200, height: 100, crop: "scale"})
cloudinary.url().transformation(new Transformation().width(200).height(100).crop("scale")).imageTag("sample.jpg")
cl.imageTag('sample.jpg', {width: 200, height: 100, crop: "scale"}).toHtml();
$.cloudinary.image("sample.jpg", {width: 200, height: 100, crop: "scale"})
<Image publicId="sample.jpg" >
        <Transformation width="200" height="100" crop="scale" />
</Image>
<cl-image public-id="sample.jpg" >
        <cl-transformation width="200" height="100" crop="scale">
        </cl-transformation>
</cl-image>
cloudinary.Api.UrlImgUp.Transform(new Transformation().Width(200).Height(100).Crop("scale")).BuildImageTag("sample.jpg")

Cloudinary supports the following image cropping modes: scale, fit, mfit, fill, lfill, limit, pad, lpad, mpad, crop, thumb, imagga_crop and imagga_scale.
Conclusion
One of the best ways to increase page performance is via image optimization, so you will want to take some time to ensure that all your images are properly optimized and cached.
We have highlighted how to optimize images using Python and Cloudinary. But these tips are just a start. Check out how to optimize your JPEG images without compromising quality for more ideas.
Cloudinary provides many options for optimizing your images. Feel free to dive in and explore them.
 |
Prosper Otemuyiwa is a Food Ninja, Open Source Advocate & Self-acclaimed Developer Evangelist. |